Wednesday, February 23, 2022

Simon Says Stamp Hoppy Days 2022 March Card Kit

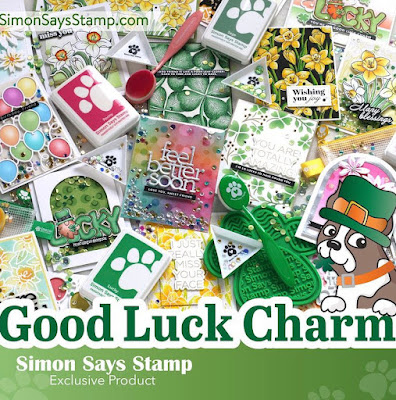
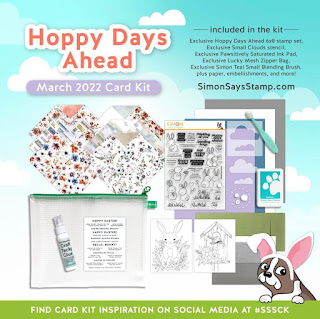
 When I saw this card kit I just couldn't wait to make an Spring/Easter card with it! It's been such a rough winter here where I live. I am so ready to see snow melt away, green grass to grow and see blooms on trees! This kit has so many wonderful elements to it! If you are interested in seeing all the goodies in this kit, please click HERE.


Here is my first project I made using the kit's adorable stamp set. I stamped the bunnies onto some smooth white card stock using Antique Linen distress ink. I stamped it very lightly because I wanted a no-line look to my coloring. I then used Prisma colored pencils to color the bunnies. I used some light shades of gray so the bunnies would still apear to be white. I did used some pink for the insides of their ears and noses.

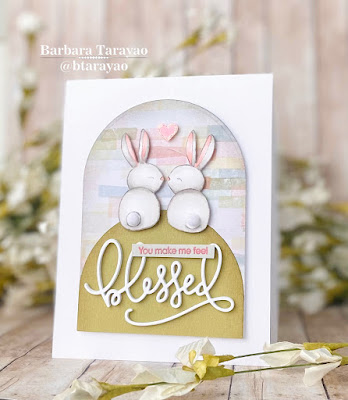
I then fussy cut them out and set them aside. I then die cut the arch shape out of the pattern paper included in the kit. I aslo used the same arch die to cut the grass out of green card stock. I used a bit of Pumice Stone distress ink to sponge all the edges of the arches. I then die cut the word blessed out of white card stock and out of fun foam to pop it up. I stamped and embossed the sentiment strip in Guava pink ink. I was able to emboss the sentiment because the ink stayed wet so I could add clear embossing powder to heat emboss it for a bit of shine.

To finish off this card I added the cotton tails with a bit of glue and a pink heart with some sparkle at the top of the arch between the two bunnies. I hope you find it adorable! I hope to make many cute projects with this kit!

All the products I used to make this card can be found at the Simon Says Stamp store.
I have provided a supply list with links below. Thanks for stopping by!!


Hero Arts Anything Goes

Hi all and welcome to another week on the Simon Says Stamp Wednesday Challenge.

This week the challenge is Anything Goes!

We are showcasing Hero Arts products this week. You don't have to use them to join in but if you have some we would love to see what you make! As always for entering you will be elegible to be entered into the drawing for a $25 voucher to the Simon store!

I have had my eye on this die set for a while. Its the Open Windows Fancy die set from Hero Arts. I love all the little detail dies it comes with!

I began making this card with a top folding A2 size card base out of smooth white card stock. I then cut a panel out of the same white card stock and cut it a bit smaller than the card base. I then chose a distress brick embossing folder and ran the panel thru my die cut machine. I then inked up the flat side of the embossing folder with some gray distress ink to give a bit of a shadow for the white bricks to pop out. 

Then I just die cut all of the pieces from the fancy window die set out of white card stock. I then colored them using some simple copic coloring. I die cut the word welcome out of white card stock and fun foam for dimension. I then cut the outline out of red card stock. I then stamped the sentiment and heat embossed with white embossing powder onto fog colored card stock strips. I used a bit of stickles to add some sparkle and die cut some small hearts to look like they are floating out the window. 

Now it's your turn! Happy crafting!

All of the products I used to make this card can be found in the Simon Says Stamp store. I have listed them and their links below:


Do you use Instagram ?  If so please add  #ssswchallenge to your challenge entry uploads so we can see them on there too.


You have until Wed  8am Ohio time. 1pm UK time, 2 pm CET to join in

Monday, February 21, 2022

Basic Box Card Happy Birthday die

 I am having so much fun with the Basic Box Card die from Simon Says Stamp. I've made a couple now and when I saw the Basic Box Card Happy Birthday die from the new Good Luck Charm release I knew I had to make a birthday box card!

If you want to expertly know how to put the box card die together, I highly recommend that you look up Jennifer McGuire or Nina Trapani on YouTube for excellent instructions on how to do so. That's where I learned. Once you make one, you realize how easy it is to put together. For my card today I used colored card stock for the base or box of the card. I then die cut cloud inserts and added them in three areas. The front, the middle and the back of the box. I then die cut the Happy Birthday box card die out of 2 shades of pink card stock. I then added that die cut to the center cloud. I die cut some flowers that were in my stash to compliment the colors I had used so far and added to the front window of the box. I then added a sentiment and that was it!


I hope you enjoy playing with the birthday box die. Practice does make perfect! I still see some mistakes i've made but that only makes me want to keeep making the fun boxes. I love how when it folds over it fits perfectly into an A2 size envelope.

The supplies I used can be found in the Simon Says Stamp store and are listed and linked below:


Saturday, February 19, 2022

Simon Says Stamp Good Luck Charm Release Blog Hop Day 2

 Thank you for stopping by! Im so excited to share the project I have made for the Simon Says Stamp Good Luck Charm release. Please click on this link to see the entire Good Luck Charm release.


Did you know that February marks the 20th birthday for Simon Says Stamp? We have a special code YUM20 to receive the Birthday Cupcake stamp FREE with any purchase! Hurry this code will expire February 20th @ 11:59pm. 

Today I have made a card using a couple of fun items from the Good Luck Charm release. We love to celebrate St. Patrick's day in our home by cooking lots of yummy dishes inspired by the holiday! Im not sure how much Irish I actually have in my family's lineage but its always been something fun my son especially loved the shamrock shake at McDonald's!!

I made this card using smooth white card stock for a top folding A2 size card base. I then cut a panel from the same card stock a bit smaller to leave a border. I then die cut the Linking Lucky Clovers die several times from a couple of shades of green cardstock from my stash.

I then arranged the clover dies around the panel and adhered them with some foam tape to give them a bit of pop. I then trimmed off the excess and added the panel to my card base. I then die the Here for You die out of gold cardstock and also from some fun foam to give it some height. The die comes with an outline and I die cut that from the white card stock.

I then added some gold flat backed pearls for a bit of interest. This was just a really fun card to make and I have listed all of the items and links I used to make it below.

All supplies can be found in the Simon Says Stamp store:

Make sure you check out Friday's Hop for more inspiration! Also, if you leave a comment on this post you will be entered into a drawing for a $25 gift card to the Simon store.

Wednesday, February 16, 2022

Whimsy Stamps Slimline Cards

 Hi all and welcome to another week on the Simon Says Stamp Wednesday Challenge.

This week the challenge is to make a Slimline Card.

We are showcasing Whimsy Stamps this week. You don't have to use them to join in but if you have some we would love to see what you make! As always for entering you will be elegible to be entered into the drawing for a $25 voucher to the Simon store!

I have chosen to make a fun birthday mini-slimline card using the Whimsy Stamps Diagonal Dot embossing folder for the background. 

I love to make mini-slimline cards. I think they are the perfect size. I cut down out of smooth white card stock a card base measuring 3 1/4 by 6 1/4. I then cut down a panel out of the same card stock to ink blend with some soft rainbow of oxide inks. I used squeezed lemonade, carved pumpkin, kitsch flamingo, wilted violet, savlaged patina and cracked pistachio.


I then ran the panel through the die cut machine inside of the embossing folder to give the colorful background some fun texture. I just love the circles! I then die cut the word happy from more smooth white cardstock and layered it onto a vellum outline die so you can still see the colorful background.


I took some Fog card stock and stamped the word birthday using Versamark ink and heat embossed it with white powder for an over all soft look. I adhered the happy and vellum background with liquid glue. I popped up the birthday sentiment with some foam adhesive and added some flat back pearls to accent.

I hope you got some inspiration to enter the challenge. I look forward to seeing what everyone comes up with! All the products and links are listed below and can be found in the Simon Says Stamp store.

Supplies used:

 So now it's YOUR turn, Happy Crafting

Do you use Instagram ?  If so please add  #ssswchallenge to your challenge entry uploads so we can see them on there too.


You have until Wed  8am Ohio time. 1pm UK time, 2 pm CET to join in


Thursday, February 10, 2022

Simon Says Stamp Emboss It!

 Hi all and welcome to another week on the Simon Says Stamp Wednesday Challenge.

This week the challenge is to EMBOSS IT!

We are showcasing Simon Says Stamp Products this week. You don't have to use them to join in but if you have some we would love to see what you make! As always for entering you will be elegible to be entered into the drawing for a $25 voucher to the Simon store!

Today's inspiration is a card I made using the Simon Says Stamp Kaleidoscope embossing folder.


I just love making spring cards when it's still the dead of winter! I grew up in California and never really have had the pleasure of watching the seasons change! If you have ever lived in Southern California you would know what I mean. After moving to Utah about 11 years ago I still get excited about the new season coming. I just love watching new blossoms replace brown withered leaves on trees and the gorgeous shades of green that just seem to magically appear! So obviously Spring is right around the corner and I have made a card with a very colorful layering tulip stamp set and for a pop of texture an embossing folder for the backgrouond. I die cut out of siver card stock the Miss You sentiment.


The supplies I have used are linked below and can all be found at the Simon Says Stamp Store.

Inks used for the layering tulips:

 So now it's YOUR turn, Happy Crafting

Do you use Instagram ?  If so please add  #ssswchallenge to your challenge entry uploads so we can see them on there too.


You have until Wed  8am Ohio time. 1pm UK time, 2 pm CET to join in


Thursday, February 3, 2022

Wedding Card with Embossing Folder technique

 How to make the background...

I love using embossing folders. They are amazing at adding beautiful texture to an otherwise plain piece of paper. I have used the Simon Says Stamp Exotic Vines embossing folder to create this wedding card. I started by taking some smooth white card stock and trimmed it down to fit an A2 size card base with just a bit of white border showing. Before I add my card stock in the folder I use an ink pad that is raised and in this case I used the Simon Says Stamp Lemonade ink pad. I then take the ink pad and swipe ink directly onto the "flat" side of the folder. This adds ink around the impressed part of the image. I then spritz the card stock with a very fine mist of water. This helps the paper form into the grooves of the embossing folder without cracking or tearing. This is especially helpful if you are using a 3d embossing folder with very deep grooves. I run it through my die cut machine and when I take out the paper I have a gorgeous image embossed into the paper with ink around the raised areas. For a little shimmer an elegance  I take a dry paintbrush and dip it into some Perfect Pearls iridescent powder and add it all over the front of the card stock. The ink is still slightly wet so the powder adheres nicely to it. It's hard to tell in the photo but the Perfect Pearls adds just a subtle shimmer to the yellow background. I think it's perfect for a special occasion card!


I hope you will give this technique a try! It yields very satifying results whith very little effort. The products I used to make this card are linked below and can be found at the Simon Says Stamp store.

Thank you for stopping by!!


Wednesday, February 2, 2022

Gina K Designs With Love


This week the challenge is

With Love


We are showcasing Gina K Designs this week. You don't have to use them to join in but if you have some we would love to see them used.
As always Simon Says Stamp will be giving away $25 voucher to shop at the fabulous Simon Says Stamp Store


I have used the Gina K Designs Harvest Flourish Stencil for the fun backgroun.


I made this card starting with an A2 size card base from smooth white card stock. I then cut a panel a bit smaller and used the stencil to add red distress ink. I then left the stencil in place and added a glossy texture glaze for some shine. When I it was dry I die cut the XOXO from the center and ink blended with more red distress ink to make it stand out a bit. I then used a pink distress ink to ink blend the the panel and ahered it to the card base. I then used foam tape to pop up the XOXO and place them back from where I had die cut them. I added the Sending Love sentiment and some flat pearls.

Distress inks used: Candied Apple, Aged Mohogany  and Worn Lipstick
If an item linked is out of stock, please hit the Notify Me button so you can get notified when it comes back in stock!

All supplies used to make this card can all be found at the Simon Says Stamp store:

So now it's your turn! Happy Crafting!


You have until Wed  8am Ohio time. 1pm UK time, 2 pm CET to join in